

Updating your Profile
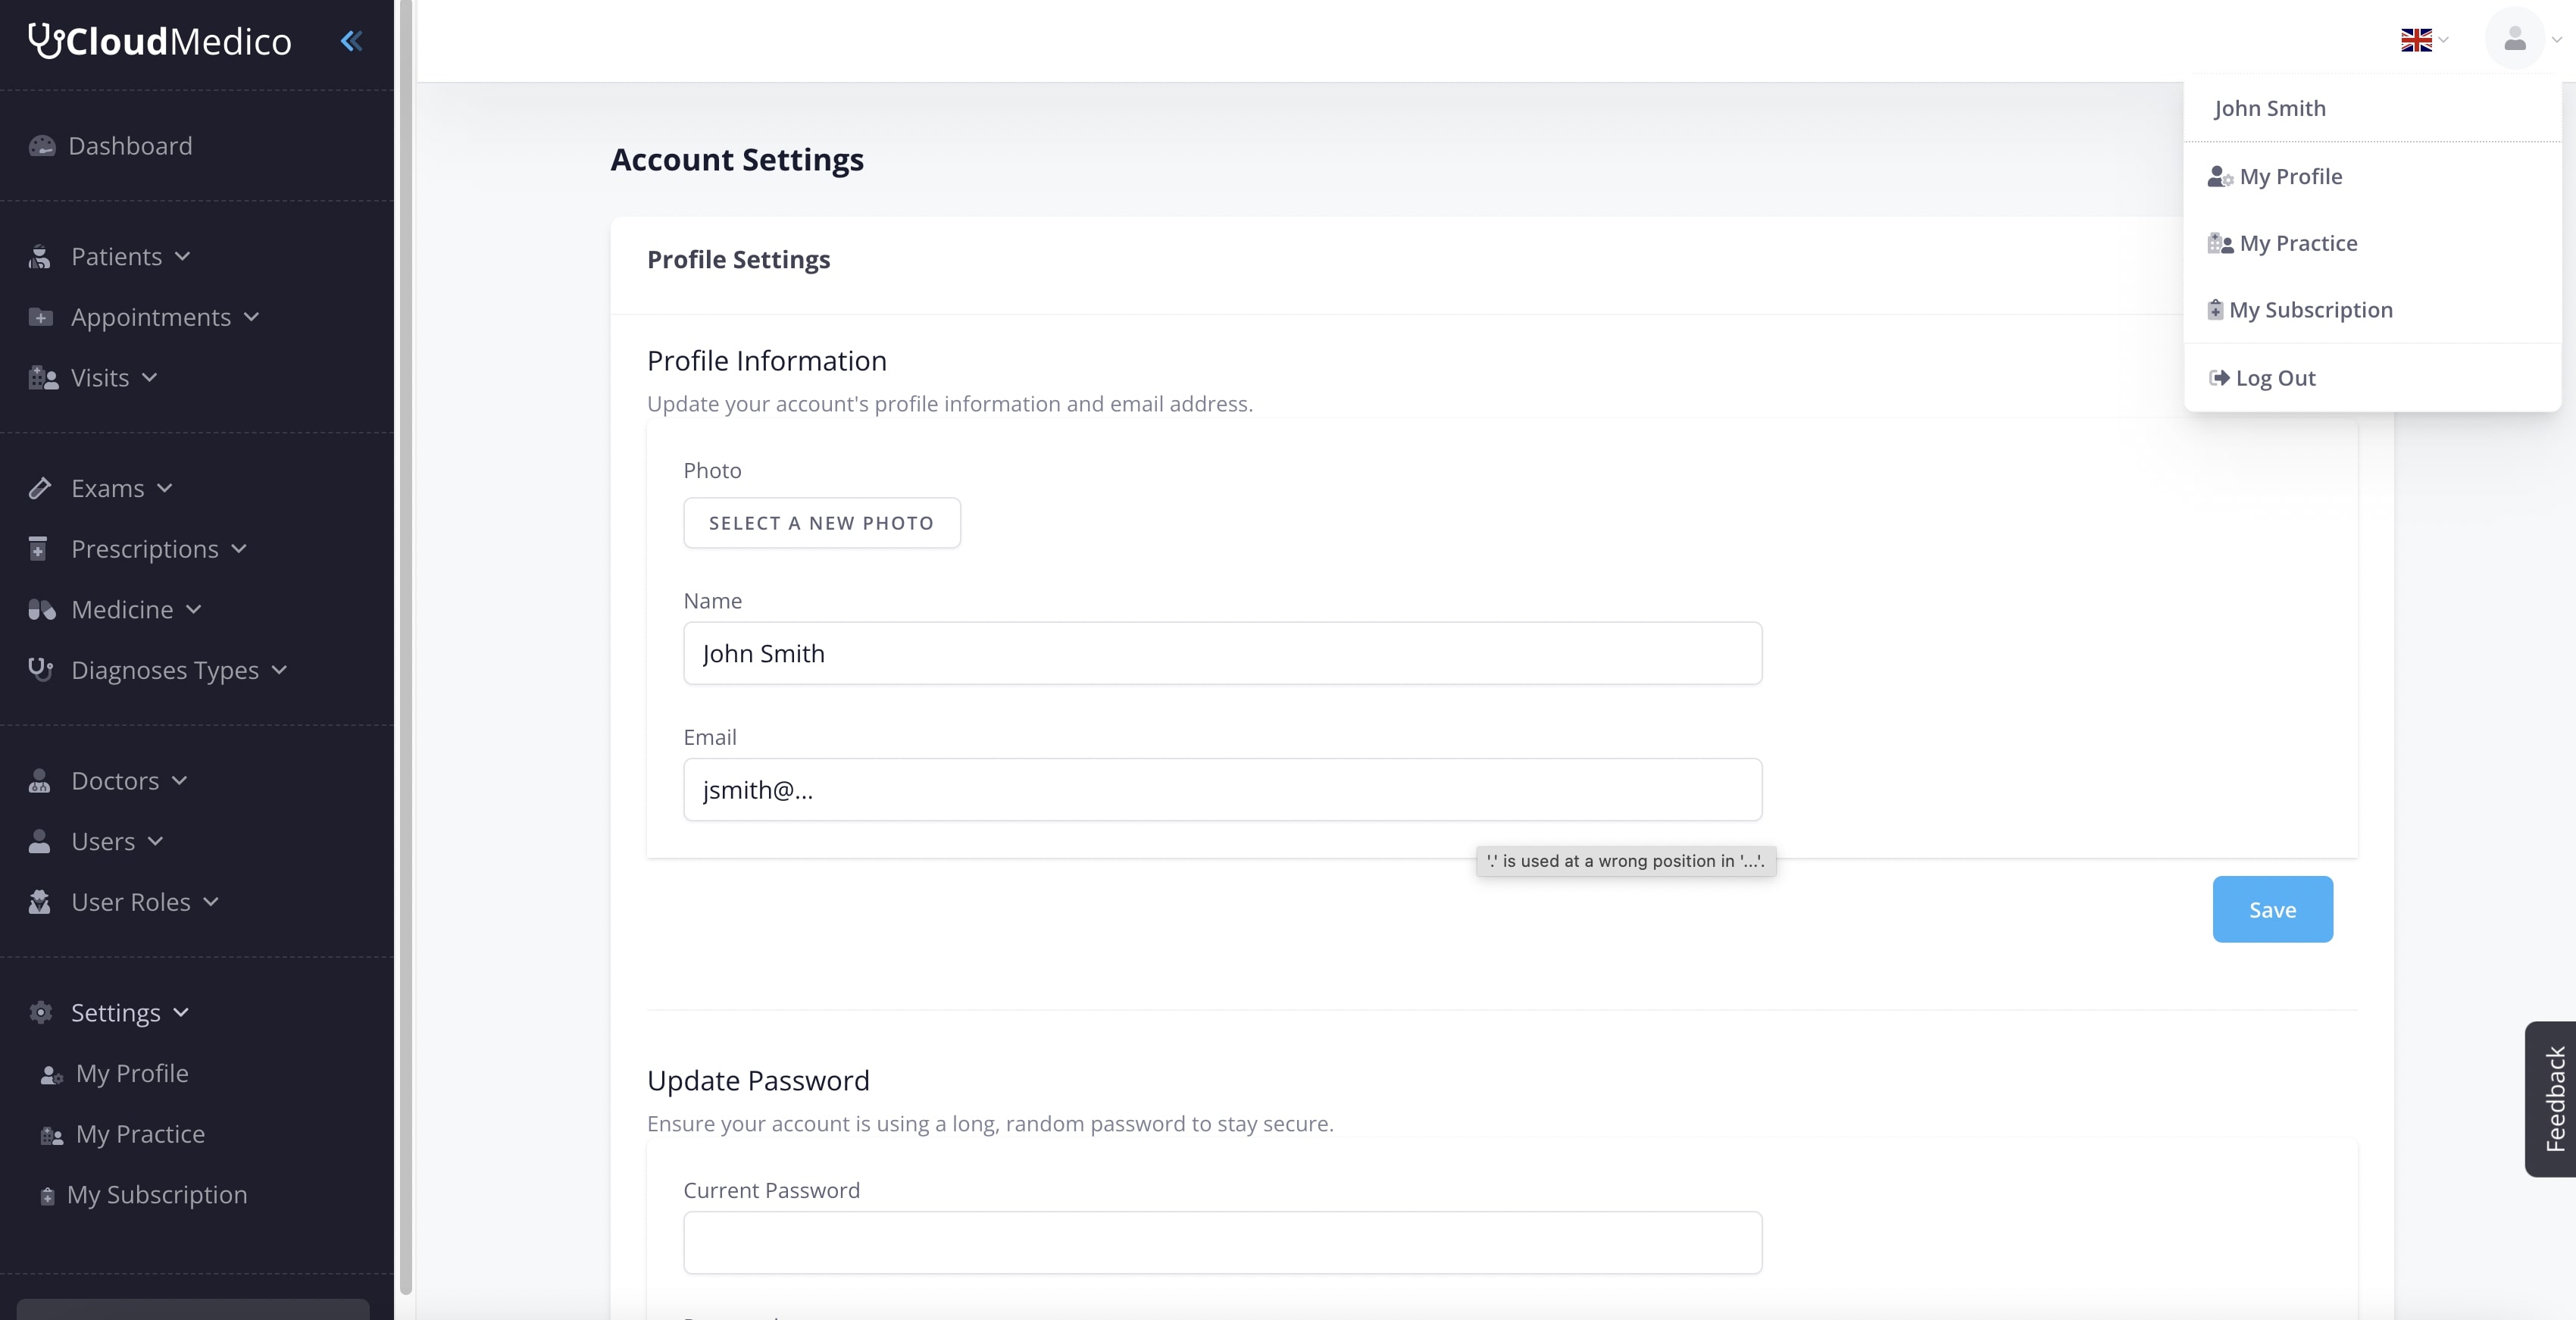
Open the Settings → My Profile link in the sidebar (or use the avatar menu in the top-right corner) to edit your personal details. Both links route to the same Profile Settings page inside the tenant portal.
The screen is split into three cards: Profile Information, Update Password, and Two Factor Authentication. Each card matches the layout you see inside CloudMedico.
Profile Information
- Photo: Upload or replace the user avatar shown across the interface and in chat logs. Use the *Select A New Photo* button to pick a PNG/JPG.
- Name: Update the full name displayed to team members and patients.
- Email: Change the login email for your CloudMedico account.
Click Save inside the card after changing any of the above fields. The form validates unique emails immediately.
Update Password
Use this card to rotate credentials. Enter your current password, then provide and confirm the new password. CloudMedico enforces strong password rules (minimum length and mixed characters). Press Save to apply the change.
Two Factor Authentication
Enable 2FA to add an extra layer of protection. When the status shows *You have not enabled two factor authentication*, click Enable to start the Google Authenticator enrollment flow. After scanning the QR code you will be prompted for a one-time token on every login.